What is Nail Art?
Nail art is an art of nail décor and beautification that has been evolving since ancient times. Early Egyptians and Chinese have marked the use of various natural colors, enamels, pearls and other embellishments to decorate and paint their nails. The advent of nail polish with its myriad shades was a revolution to this field and today nail art has turned out to be not just an art to decorate but also a technique to master the adornment and beautification of nails.
Also there are nail art enhancing products such as stickers, foils, 3D designs, stamps, nail art pens and brushes, jewels available easily. Even salons have separate nail art regimes and services that are done by professional nail artists. Many beauty and cosmetology institutes offer courses in professional nail art techniques.
Some Professional Manicuring Techniques are:
- Gel nail art: Manicures including gel nail polishes are mostly done by experienced salon artists. The gel polish is applied and then kept to set under UV light.
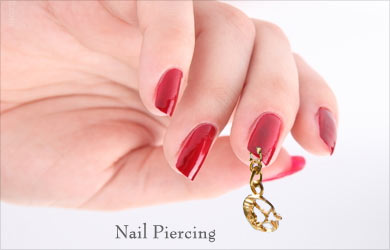
- Nail piercing: It is done by making a hole on the outer part of the nail. Then it can be inserted with any decorative embellishment or a small ring.
- Foil nail art: A professional nail artist would apply a base coat of a nail color first, upon which foil glue is applied. It can be applied in the form you want your design to be. Then the foil is placed on it and pressed slightly, before removing it slowly to get beautiful eye-catching design. These days many DIY kits of foil art are also available.
- 3D nail art: This is a practice where nails are created using different tools such as gels, glues, beads, pearls, and other decorating materials. Different type of decorating things can be used to create beautiful and attractive nail designs like beaded, vintage, bridal, feathery and ombre.
Try these Easy Nail Arts yourself
There are some easy techniques that you can even try at home without any external professional help.
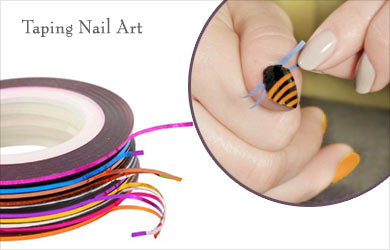
Taping: Taping uses stationary tape to make different designs on the nails.
- First apply a coat of any light color on the nail.
- Now cut the tape in any geometrical shape that you want to make, and then put the tape on your nail to cover a part of it.
- Now paint the remaining part with any dark contrasting color. Remove the tape to get beautiful design on your nail. Apply a clear top coat to get the finished manicure look.
- Enhance your look by making combining different shapes; strips, squares, triangles etc and flaunt your gorgeous nails.
Sponging: Sponging creates different shaded textures that look great on long as well as short nails.
- First apply a base coat of any light shade like nude, white, or any color complementing the texture you want.
- Now dab a sponge in two or more colors to make a gradient. Press the sponge lightly on your nail to get the impression of colors on it.
- Clean the edges of your nails with acetone.
- Experiment with different colors and textures in this technique to make your nails more attractive.
Stamping: This technique requires a lot of practice to master. Especially to create the stamps on the stamp plate and then scraping it off must be well versed to you. You need some tools for this nail art like stamping plate, scraping tool, stamp polish and stamping tool. Nowadays many stamping kits are available in the market that come pre-loaded with all the equipments.
- To start with, you must apply a base coat to your nails and then the main coat color that you want.
- Now take the stamping plate and apply the polish on it. Using the scraper remove excess polish so as to make the design visible.
- Now take the stamp and press it on the image to get its impression on it.
- Then press the stamp over your nail to get the image on it.
- Apply a top coat to finish your look. You can also decorate your design by using crystal stickers and making freehand extensions to it. Just play with your creative imagination!
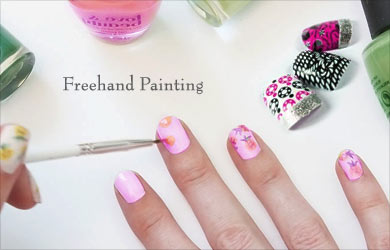
Freehand Painting: Draw anything and everything out of your imagination to get beautiful looking nails. Practice a bit before you master it all through. Use different sized brushes or simply use a toothpick to make your favorite designs.
Nail art pens are a great option for freehand art aspirants. They’re available in many colors, glitters and dual tone shades.
Dotting: Dotting can be used to create from simple looking to most intricate designs effectively.
- Apply a base coat and then apply a color coat that you want.
- Now using a dotting pen or a toothpick apply dots of a different color on your nails making design as you like.
- You can combine this technique with taping and sponging to create more detailed nail art.
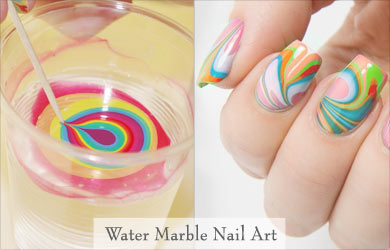
Water Marble: Water marble nail art might look like a professional’s hand but it is way simpler than it seems to be.
- Apply a nail color coat of any light color.
- Now in a water bowl drop a little amount of any color nail polish and allow it to spread.
- Then drop two or three different colors in the middle of each drop to create colored swirls in the water.
- Using a toothpick merge the colors to make different designs.
- Now carefully put your nail on it to get the pretty impression.
- Complete your look with a clear top coat.
Some Important Tips before you Start off:
- Always clean up any previous nail polish or oil with acetone before applying nail color.
- Always clean your cuticle before starting any technique. Remove any hangnails carefully.
- Filing nails to a perfect shape should always be done.

